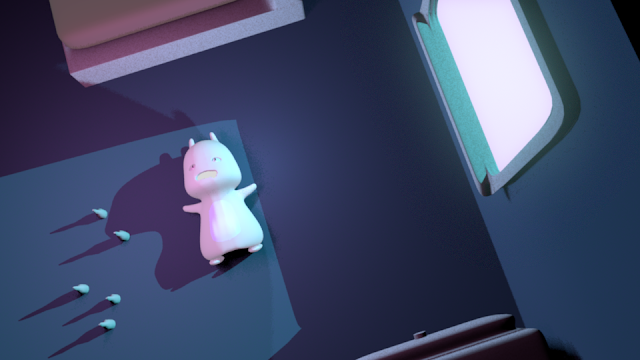
Here is the final product of my project! It looks a lot different from what I had originally planned, because of lots of problems with the settings. This project, all in all, was very fun. I learned a lot more about modeling than I had known before, and I can honestly say that I am more comfortable with it. I actually am not at where I am supposed to be actually. I was supposed to bring my product into mudbox and touch up/sculpt my model/room there, however there were a lot of bugs in maya that took whole work days to fix. By the time I had finished my character, I wanted to take him into mudbox, but then I decided that it would be smarter to model the room he was in first in order to get the positioning correct. By the time I actually finished the room, there wasn't much time to add more onto it, so I decided that there wasn't much I could change anyway, so I went straight into lighting. In this project, I am probably most proud of the way I lit up the scene, and all the colors I chose for both the character, the lights, and the room. Although I ended up doing an all right job, most of my problems came from modeling, and were mostly due to the fact that a lot of my models were messy. I'll practice making cleaner things in the future. Here is another draft of my scene before I had to play with the settings:
Friday, January 29, 2016
Day 11
Tuesday, January 26, 2016
Day 9
Ive began to model furniture, and set a position for my character in my scene. Now that im moer confident in what my still will look like, i may bring it into mudbox soon.
Monday, January 25, 2016
Day 8
I started adding to my room after freaking out from seeing the tutorial put the model into mudbox with the room. So I put in a window and a door, and set many edge loops to round the room well.
Friday, January 22, 2016
Day 7
So it turns out that something wrong happened while saving, and it messed up my model. Like a lot. So i spent most of the day fixing it. I also used that time to clean up a lot of the edges on my model, simplifying the shape to lower render time.
Wednesday, January 20, 2016
Day 6
My model is pretty much complete now! I put the two halves of his body together, essentially completing him. Many of the vertices were off, so I had to play around with them to make it look clean. If there is nothing else to do in the tutorials, I will be taking this into mudbox.
Friday, January 15, 2016
Day 5
I finished modeling his body and attached his arm. I learned more effeciant ways to combine points to more easily attach things like body parts or legs. I played around with smoothing out my model too. Still got a while to go!
Wednesday, January 13, 2016
Day three
Ive now finished the body of my character by moving points and adjusting them to see what kind of posture my character would have. I cut out some parts of the neck and connected them to the body, deleting some edges to even out the space between the head and the body.
New project! Day one.
Im starting a new project! Im making a still with an original character I made. he looks like a sort of bunny/ teddy bear thing. I finished his head and eyes!
Subscribe to:
Comments (Atom)


